Showcase
Colin Bushell - March 2023 - A Small Occasional Stool / Small Table
Some twelve or so years ago I signed up for a course to learn the intricacies of Cane (Rattan)Work and Rushing. I repaired a number
of chairs and replaced the canework and similarly replaced the rush seating on a couple of items.
I quickly found that people were reluctant to pay the going rate for the necessary skills required to repair or replace cane or rush
furniture, just like paying for quality wood turning. Sadly then, this acquired skill didn’t materialise into a commercial venture and
because of that I had quite a bit of cane left over. I began to think it was time I put this residue of cane to good use, employing
my turning skills as well.
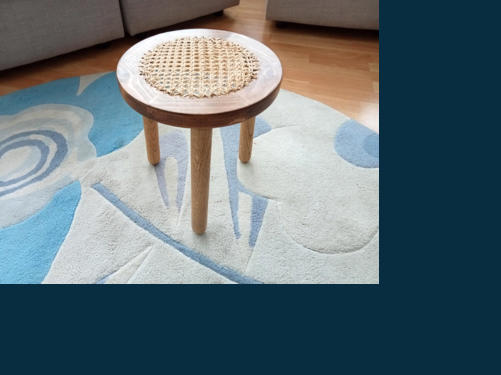
Fig 1. The Finished Atricle
The Project.
Initially I thought the round part of that shown in Fig 1.had to be of such a size to fit over my lathe bed. First mistake as I could have
swivelled my lathe head round but it just didn’t dawn on me at the time. Duh! I started by working out the outer and inner
circumference and the number of pieces of timber required. Of course, this could vary depending on material available and size you
would like the finished article to be.
I then drew the whole thing out on paper calculating angles, thickness of timber and so forth. To cut the angles accurately I used a
manual (“handraulic”) version of a chop saw and carefully cut the pieces of timber to size. All the joints between the angles were made
using a biscuit cutter, gluing the biscuits in place and clamping the hexagon shape until the glue had cured; making sure the whole thing
was glued in a flat plain.
Mounting onto the Lathe.
To turn the outer circumference I firstly cut the sharp edges off the hexagon using a band saw but, how was I going to mount the open
piece on the lathe, centrally?
I found a roundel of melamine with an internal dovetail I had used for another project. This was big mistake which I will explain later.
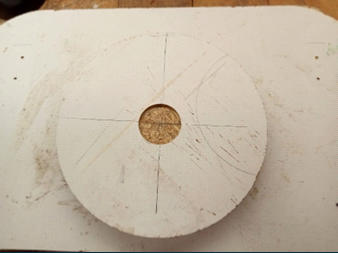
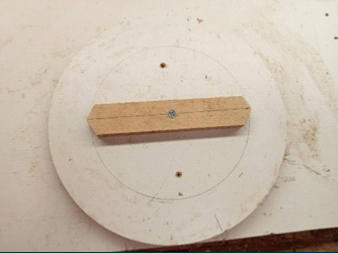
Fig 2. Melamine Roundel
Fig 3. Reverse side of roundel with centring device
To fit the hexagon shape centrally I made a gauge that would fit into the internal angles (Fig 4.)and screwed it to the
melamine I then secured the hexagon shape using double sided tape. See Fig 4.
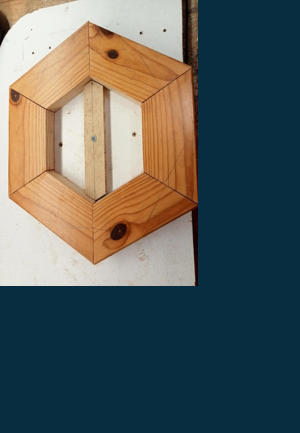
I offered the roundel to the jaws of my chuck and was able to secure it long enough to turn the outer circumference.
I was just sanding the outer circumference when break out occurred from the internal dovetail resulting in the whole
thing coming off the lathe. How many times have we been told not use chipboard/melamine with an internal dovetail.
As the external circumference had been completed I then employed my button jaws to hold the ring whilst I turned
out the internal diameter. To do this safely and without damaging the button jaw plates I turned half first, flipped the
ring over and completed the reverse. I didn’t need to finish this yet as you will see.
To facilitate the underside of the seat for working the cane, I needed to turn a 10 mm rebate to about half the thickness
of the ring. Once done I flipped the piece over and sanded the inner rim which now would be proud of the base plate of
the stud jaws.

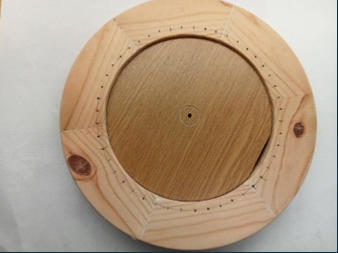
Fig 4. Shows the centralising gauge before the corners were cut off the hexagon shape
The piece of waste in the centre, a kind od jam chuck, will be used for stabilising the ring because a number of holes were
required to be drilled as in Fig 6.
Fig 5. Turned Rebate
Fig 6. Top Side showing marking for holes
The holes required to facilitate the cane/rattan needed to be 4mm in diameter and 12mm apart, marked out as in Fig 6.
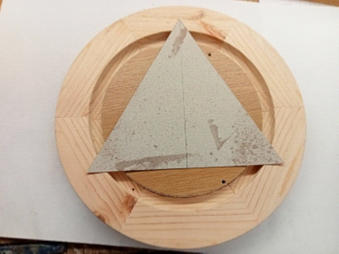
Prior to drilling the holes I needed to establish where the legs would go in relation to the joints. I used the drawing I had
created to form an equilateral triangle out of cardboard. Having cut the triangle to shape I placed this on the ring and
marked the centres using the points of the triangle. See Fig7.
Why three legs and not four? An object with three legs wont wobble. Fitting four legs increases the accuracy element in
trying to keep it level thereby cutting out any wobble.
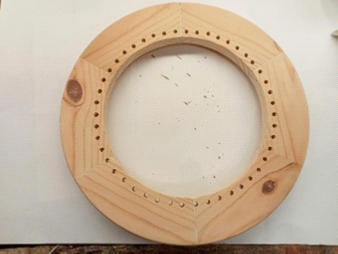
Fig 7. Marking the holes for the legs using a triangle
Fig 8. The top with holes drilled
Now the legs. I turned three legs out of oak and rounded the foot. Again, this is easier than an angled flat foot to suit the
angle of the leg. I estimated the angle of each leg to be about 7 degrees but with hindsight it could have been 10 degrees
or slightly more.
To drill the holes for the legs I tilted my pedestal drill bed but used the ‘LEVEL App’ on my phone for a more accurate reading.
The topography of your workshop floor should be considered when making these calculations. That is to say make sure your
pedestal drill is level. The hobbyist/cheaper versions of pedestal drills and bandsaws have crude angle escutcheon rings and
shouldn’t be relied upon.
Three holes were drilled, using a Forstner bit of a size I had available, only half of the thickness of the top. I made the top
part of each leg a diameter to fit the hole.
I glued each leg in place but also pinned them from inside.
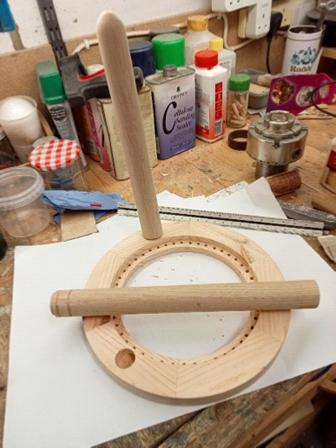
Fig 9. Showing angled hole and leg fitting
Once the legs had been fitted I stained and polished the top. The legs had been polished during production.
Now to create the top using the rattan. It had been some time since I had done any of this and I experienced a couple of
infuriating false starts. Fortunately I had a guide, ‘Cane Seating’ by Barbara Maynard (ISBN 1-89997-113-0) to help me on the
way. The end result being that at Fig 1.
What went well:
I was very pleased with the final product but should have used a better quality top. The design, from scratch, which is
imperative on an exercise like this. Being able to use a whole host of skills learned over the years and of course turning
skills learned from the Kennet and Avon Wood Turners.
What didn’t go well:
Using an internal dovetail with chipboard or Melamine. DON’T DO IT! I used scrap pine for the top where a more substantial
hard wood would have been much better. The design for the diameter of the top should have been bigger with cane work in
mind. Because of the small diameter it became very crowded during stages five and six (the final stages) of the weaving.
Recommendations:
If anyone is interested in the canework aspect I recommend that a hands-on course is sought from a professional. Its not
something that can be demonstrated.
Colin Bushell - (A valued member of the Kennet and Avon Woodturners) - March 2023
To go to previous Showcase Page - Click HERE


